Testing The KeyCloak OpenID Connect
— User Authentication and User Verification process
Photo by Michal Dolnik on Unsplash
This post continues from the previous post on KeyCloak Setup.
Keycloak OpenID is an open-source Identity and Access Management (IAM) system that provides Single Sign-On (SSO) capabilities for web and mobile applications.
[0] Pre-requisite for this exercise
Assuming that a KeyCloak server has been setup with a realm myrealm, a client myclient and a user myuser. Otherwise, follow the previous post to prepare the setup steps.
In addition to the above, a scope would need to be defined for the user during authentication.
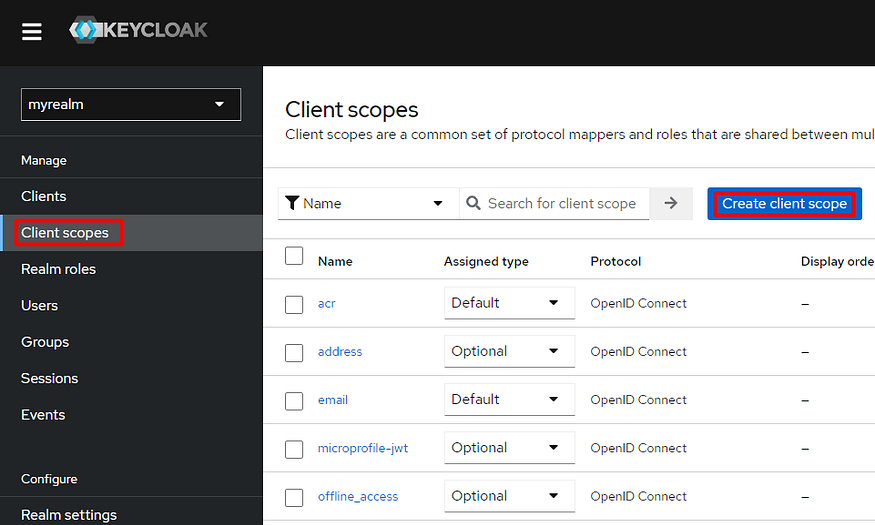
In the left panel, click Client scopes item.
In the main panel, click Create client scope button.
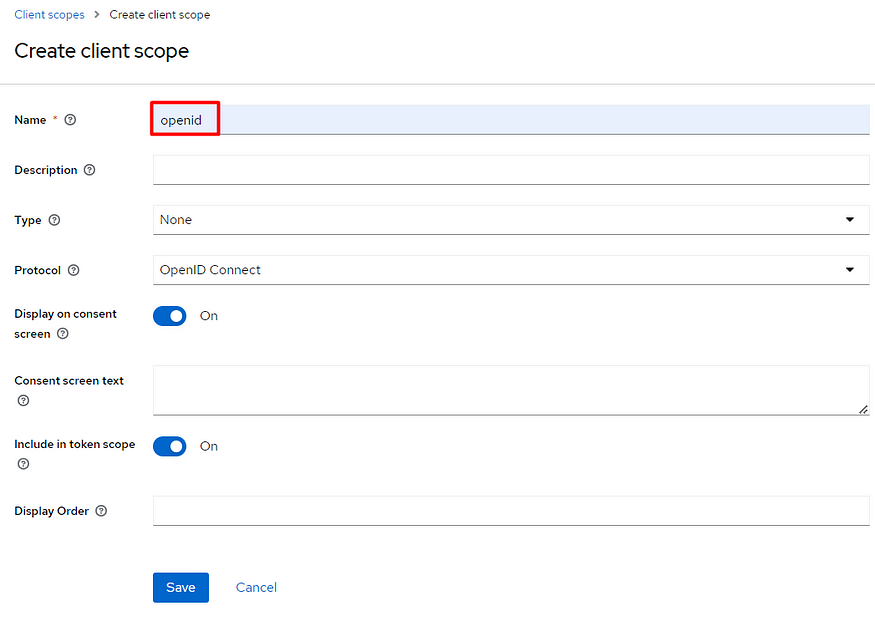
Give the scope a name openid.
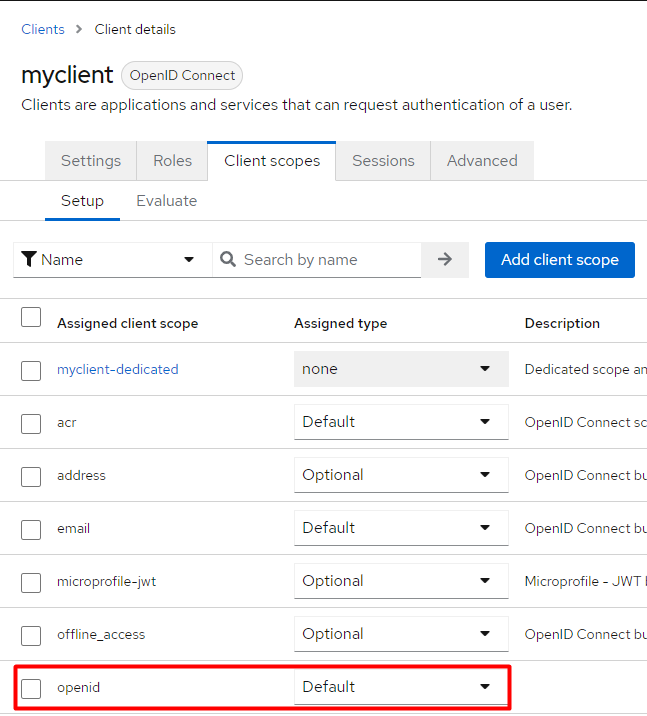
Add the scope to the myclient.
[2] Get the OpenID Configuration
In the left panel, select myrealm realm and then click Realm settings.
In the main panel, under the General tab, find the Endpoints link located at the bottom of the page.
Click the link.
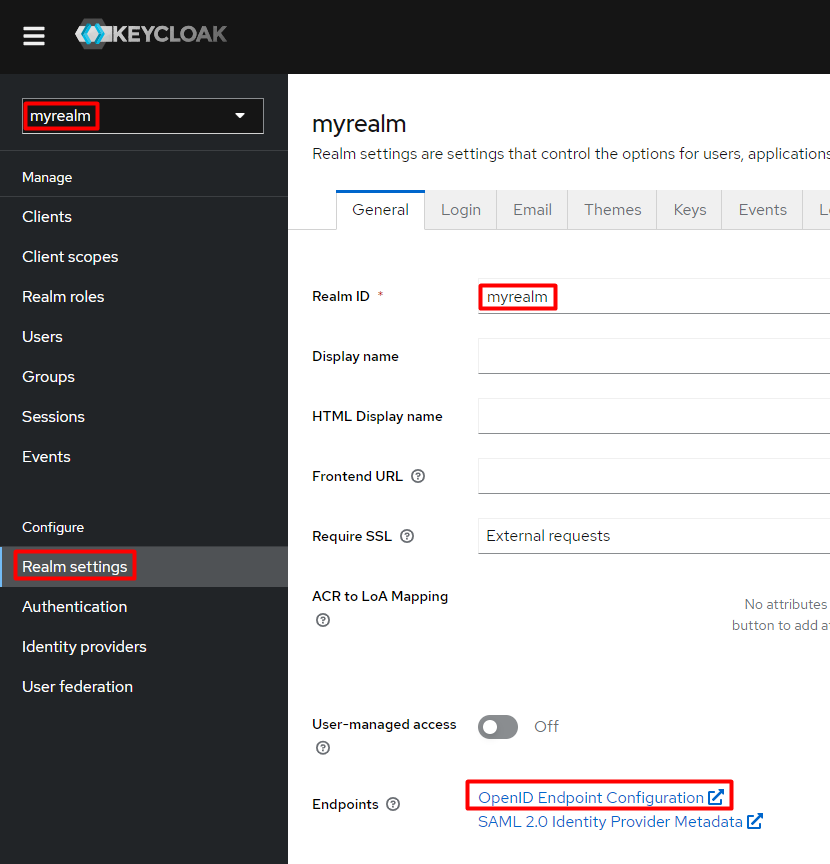
The browser will display the text data as shown below:

Notice the authorization endpoint for authentication: http://localhost:8080/realms/myrealm/protocol/openid-connect/token
and the userinfo endpoint for verification: http://localhost:8080/realms/myrealm/protocol/openid-connect/userinfo
These two endpoints will be used in Step 3 and Step 4 below.
[3] Authenticate User
User Authentication is a process that verifies a person’s identity allowing them access to an online service, connected device, or other resource. In the KeyCloak case, a person will provide a username and password to the server and in return obtains an access token.
An access token is a JSON web token (JWT) that contains information about the user and their authorization to access protected resources.
In the Postman application, import the following CURL command:
curl -X POST http://localhost:8080/realms/myrealm/protocol/openid-connect/token `
     -H 'Content-Type: application/x-www-form-urlencoded' `
     -H 'Accept: application/json' `
     -d 'grant_type=password' `
     -d 'client_id=myclient' `
     -d 'scope=openid' `
     -d 'username=myuser' `
     -d 'password=Abcd1234'
The above is a Windows PowerShell version of CURL code. Linux users would need to replace the backtick ` with backslash \.
Outcome:
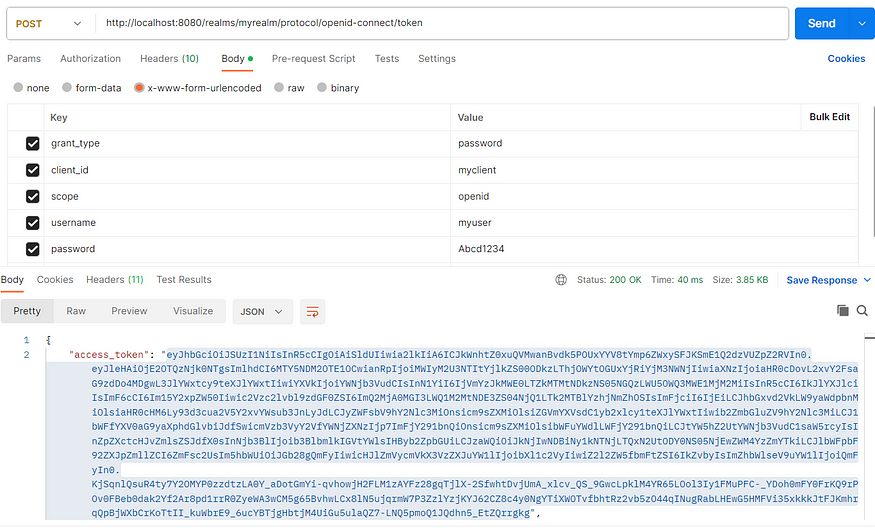
The KeyCloak server returns an access token for a successful authentication process.
The access token can be checked (e.g. using the website jwt.io) for its payload i.e. the user information.
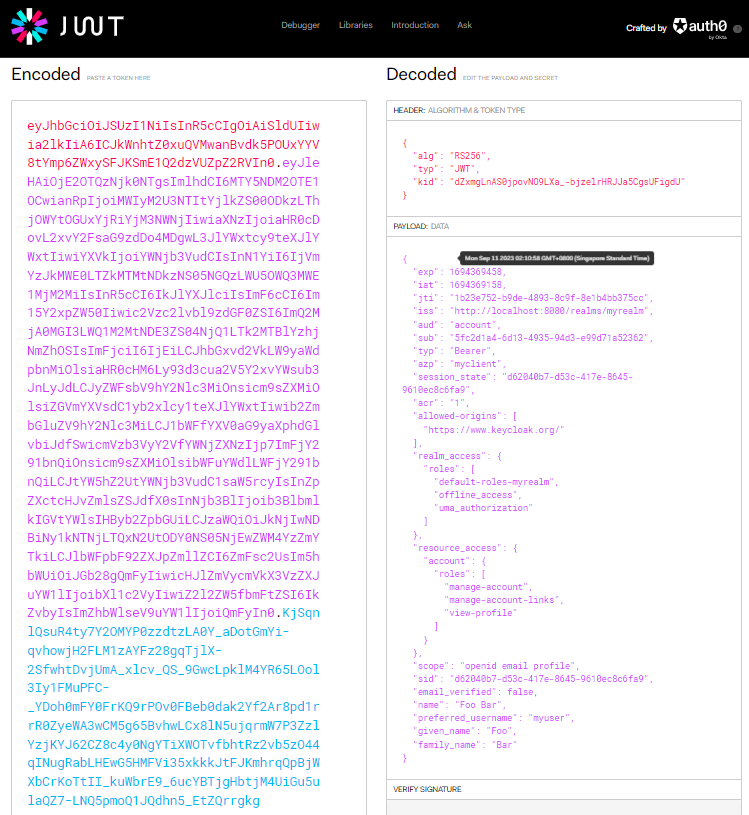
Alternatively, we can send a CURL command directly in the PowerShell Window:
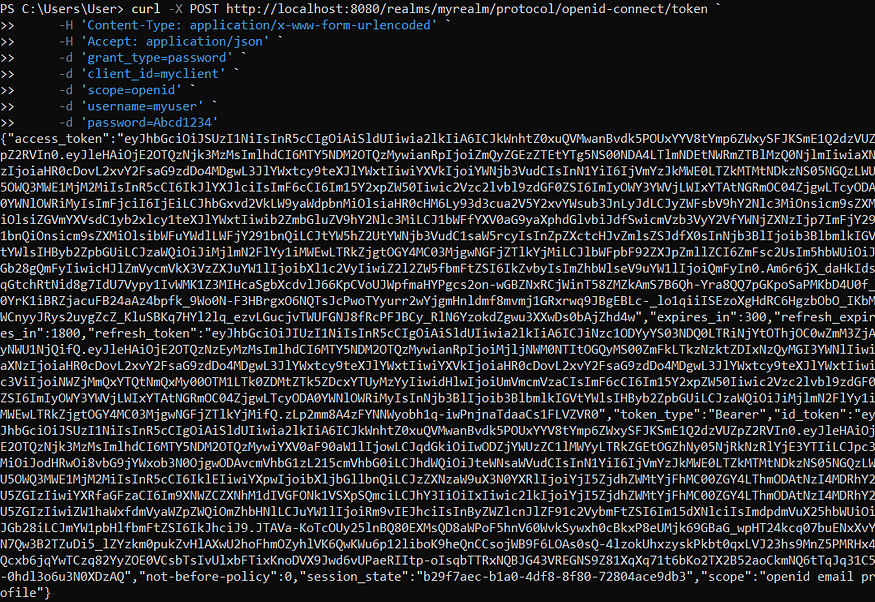
[4] Verify User
The access token can be checked against the Key Cloak server for verification i.e. the process of making sure every user is exactly who they are supposed to be.
In the Postman application, import the following CURL command:
curl -X GET http://localhost:8080/realms/myrealm/protocol/openid-connect/userinfo `
     -H 'Content-Type: application/x-www-form-urlencoded' `
     -H 'Authorization: Bearer <paste accesstoken here>'
Set the Authorization type as Bearer Token. Ensure that the Token field contains the access token obtained from the Step 3.
Click Send button.
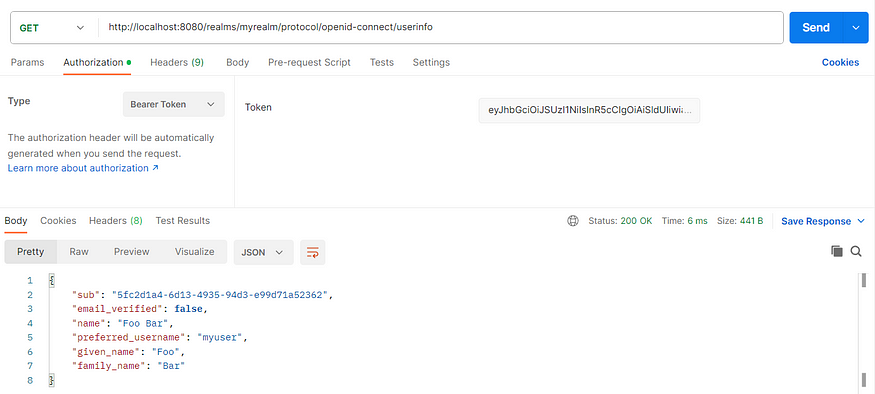
Similarly, the CURL command also works in the PowerShell Window:

The KeyCloak will return the user information for a given access token. For the above case, the user information is as shown below. This tallies with the actual information created for that user in the previous post.
{
    "sub": "5fc2d1a4-6d13-4935-94d3-e99d71a52362",
    "email_verified": false,
    "name": "Foo Bar",
    "preferred_username": "myuser",
    "given_name": "Foo",
    "family_name": "Bar"
}
Reference: https://www.keycloak.org/docs/latest/server_admin/index.html (Version 22.0.1)